
The Pax 3 is a portable dry herb and concentrate vaporizer from Pax Labs. This is the third iteration of the very popular Pax line and it continues to improve while staying true to what made the Pax so popular in the first place; elegant look and feel, ease of use, portability, top-tier reliability, and a good warranty.
Update: The Pax 3 is currently being phased out by the new Pax Plus Vaporizer. Check out my Pax Plus review for a complete breakdown between the Pax 3 and the Pax Plus, a brief history of all the Pax vaporizers, and some info about the new Pax Mini.
You can also check out my Pax Mini review, which is the new version of the Pax 2.
This Pax 3 vaporizer review will talk about the upgrades over the Pax 2, including a new Concentrate insert, an upgraded battery with bumped capacity from 3000 mAh to 3500 mAh, and quicker heat-up times from around 45 seconds down to around 15 seconds. You also get haptic feedback (vibration alert) and the brand-new Pax Vapor app which gives you full control over the temperature spectrum.
The Pax 3 now comes in two different kits. You can choose the “Device Only” option ($199), which includes everything you need to vape dry herbs (no half-pack lid), OR you can pick up the “Complete Kit,” which is now $249 and comes with everything you need to vape both dry herbs and concentrates plus the half-pack lid.
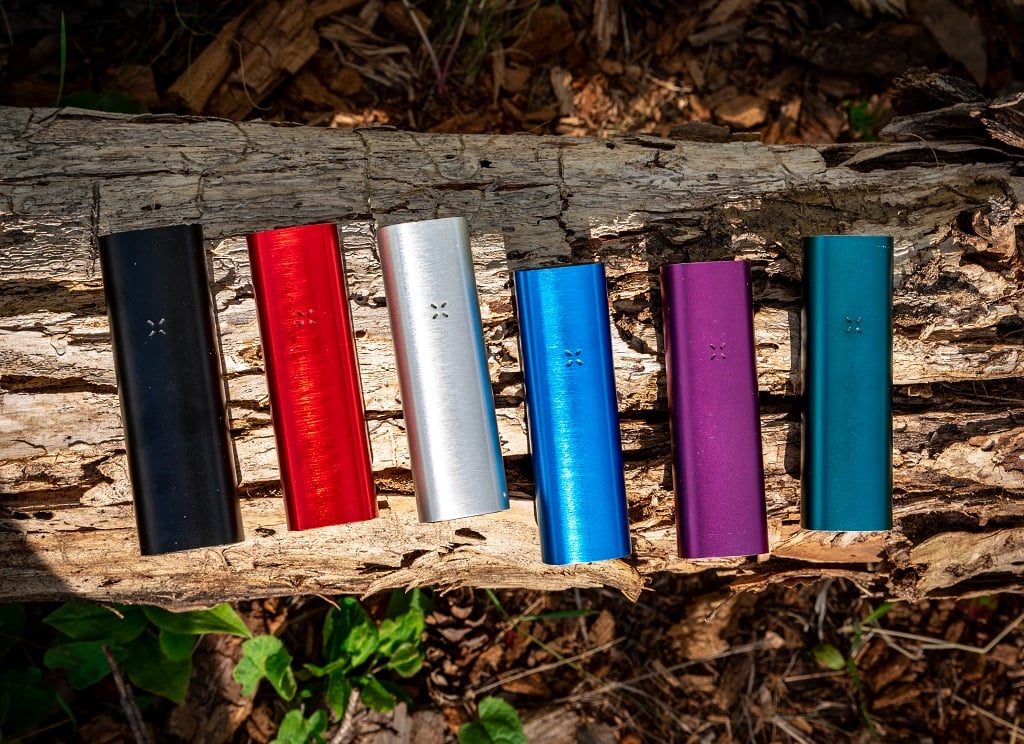
The complete kit comes with the half-pack lid, the concentrate insert, and a small carrying case. Pax also added a new matte finish and will be phasing out the glossy finish. Teal is the new color along with Rose Gold, Black, and Silver.
Table of Contents
- Pax 3 Size and Portability
- Build Quality + Haptic Feedback
- Accessories, Half-Pack Lid, and Concentrate Insert
- Heating, Vapor Path, and Temp Options
- Pax 3 App (Android & iOS Info)
- Chamber Info and Bowl Size
- Cleaning and Maintenance
- Pax 3 Battery Information
- Pax 3 vs Pax 2
- Pax 3 Vaporizer Review Wrap-Up
- Technical Specs
Pax 3 Size and Portability
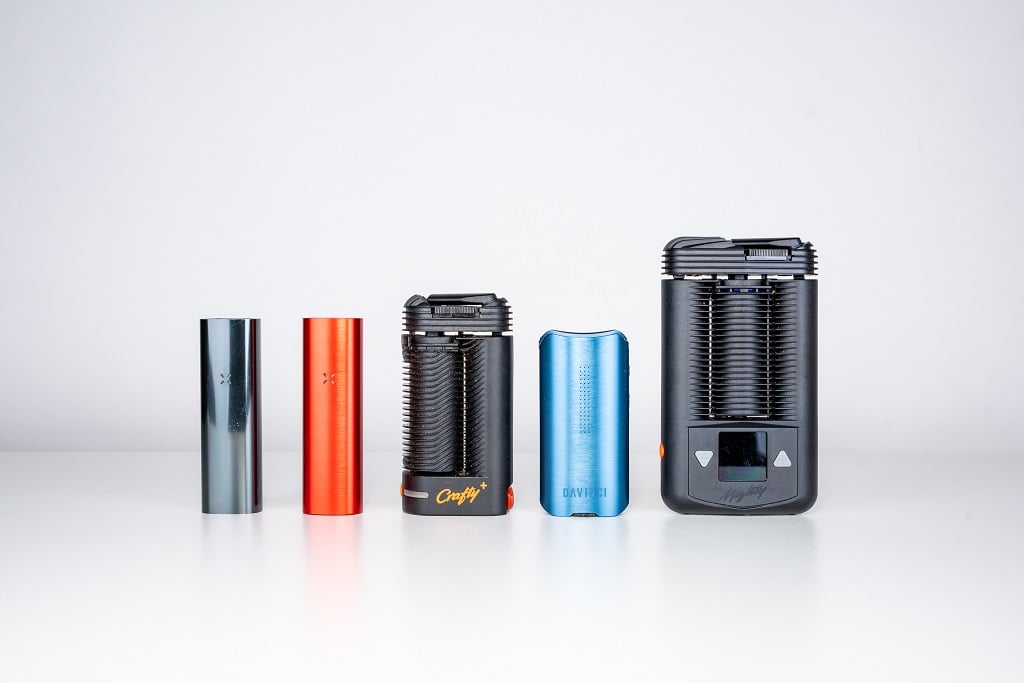
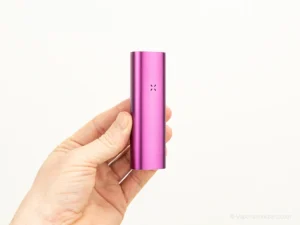
The Pax 3 doesn’t produce top of the line flavor or offer replaceable batteries but the overall package including size, portability, battery life, build quality and ease of use made the Pax 2 my most frequently used vape. Especially for outdoor activities such as hiking, biking, skiing, and snowboarding. In this Pax 3 review, you’ll see that the Pax 3 has the same physical dimensions as the Pax 2 with a slight weight increase of three grams.
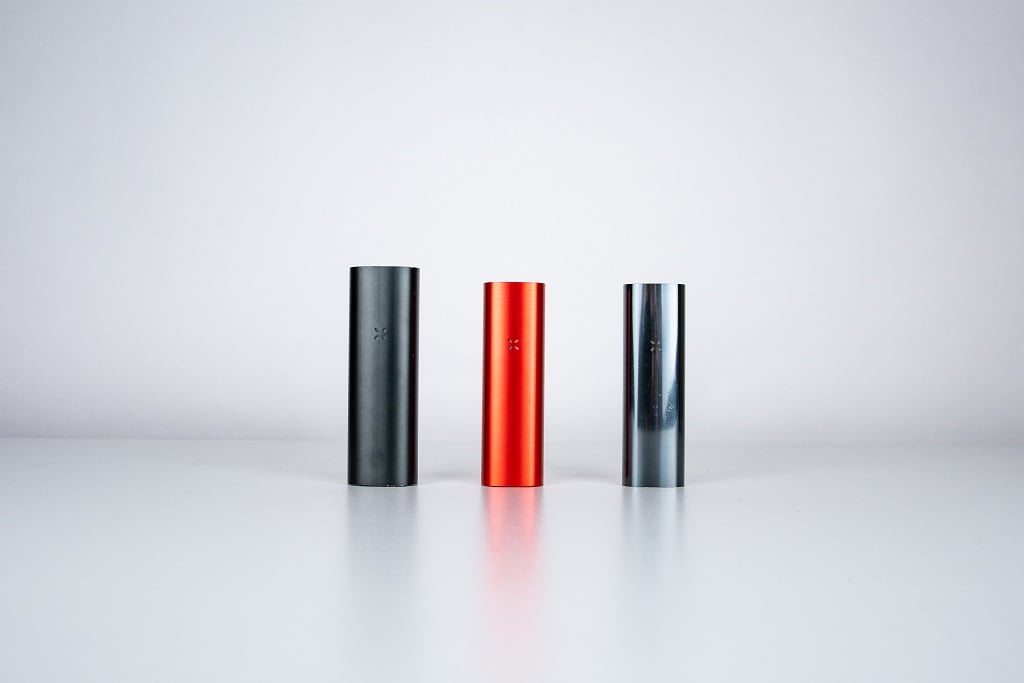
Pax 3 Size – I am actually happy they kept the same size because I really loved the size, weight distribution, and overall feel of the Pax 2. It also means aftermarket accessories for the Pax2 will work with the Pax3. When you hold the Pax 3 you will notice that it has a nice solid feel with even weight distribution and no rattles or loose parts.
Portability – Out of the box the Pax 3 is visually very stealthy, however, it can be smelly after use (especially if you don’t empty the oven after your sessions), so if you personally need to be extra discreet about the smell, I recommend you pick up the ‘Pax 2 End Caps’ for less than $3 from Delta 3d Studios to conceal the excess smell.
The first thing you will notice after picking up the new Pax vaporizer is the matte finish. It’s more resistant to scratches, feels good in the hands, and in my opinion, nicer looking than the transverse brushed finish on the Pax 2.
Build Quality + Haptic Feedback
Build Quality – My Pax 3 has been on a handful of biking and skiing trips already but has yet to encounter any hard falls so my finish is still in perfect shape. I will be going on some more biking adventures this summer and we will see how the finish holds up after another season. I do fully expect it to pass with flying colors, but I will continually update my review as I continue to use this vaporizer.
Haptic Feedback – One of the minor upgrades to the Pax 3 is the addition of haptic feedback or vibration alert. This is a feature that has become more and more common with the newer vapes. I am actually really impressed with the vibration on the Pax 3, the vibration is minimal but noticeable, some vapes can make audible/obnoxious noises while they vibrate but the Pax vibrate is a good combination of noticeable yet still discreet.
Overall the Pax vaporizers have always felt very strong and durable in the hands while being backed up by a 10-year warranty and a good reputation for reliability. Pax 3 is no different.

Accessories, Half-Pack Lid, and Concentrate Insert
This is the biggest addition to the new Pax 3. Instead of getting one chamber lid you now get three choices. First, you get the original chamber lid for a full-size oven, the newest option is the half-pack lid which I’m a HUGE fan of and last but certainly not least, the new concentrate insert.
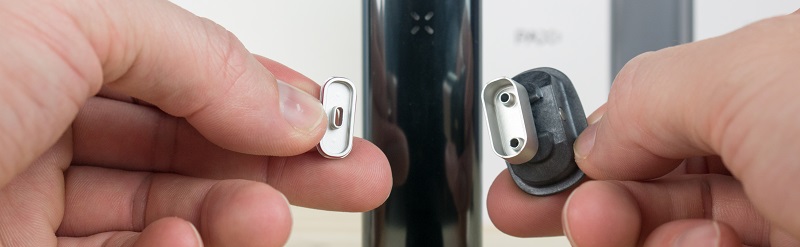
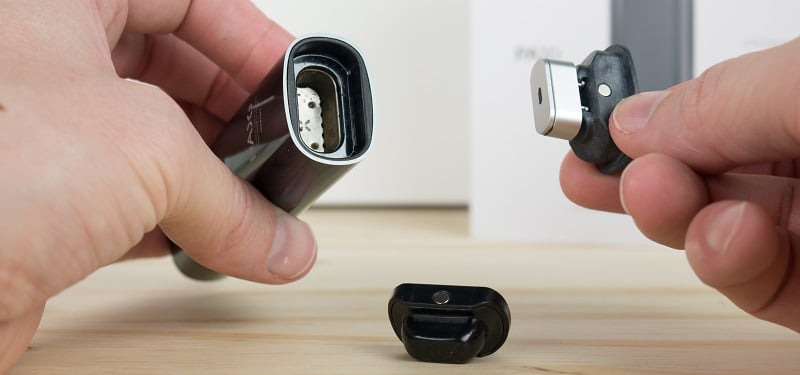
Pax 3 Half-Pack Lid – One of the biggest complaints I’ve heard from users with the Pax and Pax 2 is the oven size is too big for single session users. Previously, you had to make a custom insert out of a folded stainless steel screen, or purchase 3rd party accessories to really make the Pax/Pax 2 efficient for one person sessions. The Half-Pack lid has greatly improved the single user session and it’s pretty much the only lid that I use now when I am solo. I also noticed the Half-Pack lid reduces to amount of draw resistance and allows for a freer-flowing draw. I estimate resistance is reduced by around 15-20% so overall I am really happy with the new lid.

Concentrate Insert – I’m extremely happy that Pax Labs decided to listen to us and add in a concentrate option. The growing trend is hard to ignore and consumers (myself included) like the option to use concentrates with their portable vaporizers.
I’ve found the concentrate lid to work well. I’ve gone through a bunch of bowls at this point and have tried some runnier concentrates as well as more waxy flakey concentrates. So far nothing is leaking and there are no messes to clean up afterward. It’s definitely a session style with concentrates where you can get a dozen or so tasty draws as opposed to a red-hot pen coil, dab rig or something like the Cloud EVO where you are taking 1-2 lung-busting rips.
The taste and vapor smoothness are really nice. The vapor is not incredibly dense, it’s definitely on the lighter and tastier side. Previously people used to sandwich concentrates between dry herb, or wrap concentrates in cotton and fill the oven, however, the new concentrate lid definitely blows the older methods out of the water in my opinion. Overall I find the Pax 3 to be very effective and efficient without making a huge mess or wasting materials.
Mouthpieces – With the Pax 2, I almost exclusively used the flat mouthpiece because the raised mouthpiece would get hot on my lips and provided an overall worse experience in my opinion. They have now improved the raised mouthpiece and its equally enjoyable to use, although slightly different. At the moment I can’t decide which one I like more, I think I am leaning towards the flat MP for the cleaner look, however, it may just be that I am used to the flat MP from extended Pax 2 use.
Heating, Vapor Path, and Temp Options
This is another big area of improvement and I’m finding myself reaching for the Pax 3 more often now because of the quick heat up time. The Pax 2 takes about 45-60 seconds to heat up which has slowly been falling behind a lot of the newer vapes. But now I’m grabbing the Pax 3 because I can start a session in about 15 seconds. The Pax 3 is currently the fastest heating conduction session vape I own.
Now the Pax 3 still won’t heat quite as fast as the GH or Firefly 2 if you’re looking for an on-demand portable that you heat up for each individual draw instead of heating the whole oven for a full session. But it’s much-improved heat up time makes it the fastest heating portable conduction session vaporizer I have tested yet.
Pax 3 Temperature Options – The four Pax 3 heat settings are:
- Temperature 1 – 360F / 182C – 1 Green LEDs (16 second pre-heat time)
- Temperature 2 – 380F / 193C – 2 Yellow LEDs (16 second pre-heat time)
- Temperature 3 – 400F / 204C – 3 Orange LEDs (17 second pre-heat time)
- Temperature 4 – 420F / 215C – 4 Red LEDs (18 second pre-heat time)
The vapor path remains the same as the Pax 2. Like I mentioned above, I’ve found less draw resistance with the Half-Pack lid but everything else seems to be pretty much the same.
Pax 3 App (Android & iOS Info)
Pax 3 Vapor APP Guide [4K Video] ~7:37
Update: There are currently no available options for the iOS users and the pax vapor app. The video above uses a program no longer available. Android users can still use the app normally.
The Pax Vapor APP allows you to customize your session with individual temp selections and with different heating profiles. The five different Pax 3 heating profiles are standard, boost mode, efficiency mode, stealth mode and flavor mode.
- Boost mode keeps the oven hotter for longer with less auto cooling. I personally like this mode if you are looking for a faster session, you are looking for denser clouds, or you are using the Pax with a water pipe adapter.
- Efficiency mode ramps up the oven temperature throughout your session so this is an enjoyable setting to use.
- Stealth mode cools quicker and allows for stealthy light quick hits.
- Flavor Mode is all about preservation and only heating your herbs when you are drawing, use this mode if you value flavor and vapor smoothness over vapor density.
So far I’ve been using stock settings (with all modes turned off), the efficiency mode, and occasionally Flavor mode for my normal-dry herb sessions, but I’ve been using boost mode when I’m using glass at home or using the concentrate insert. Watch my full pax vapor app guide below.
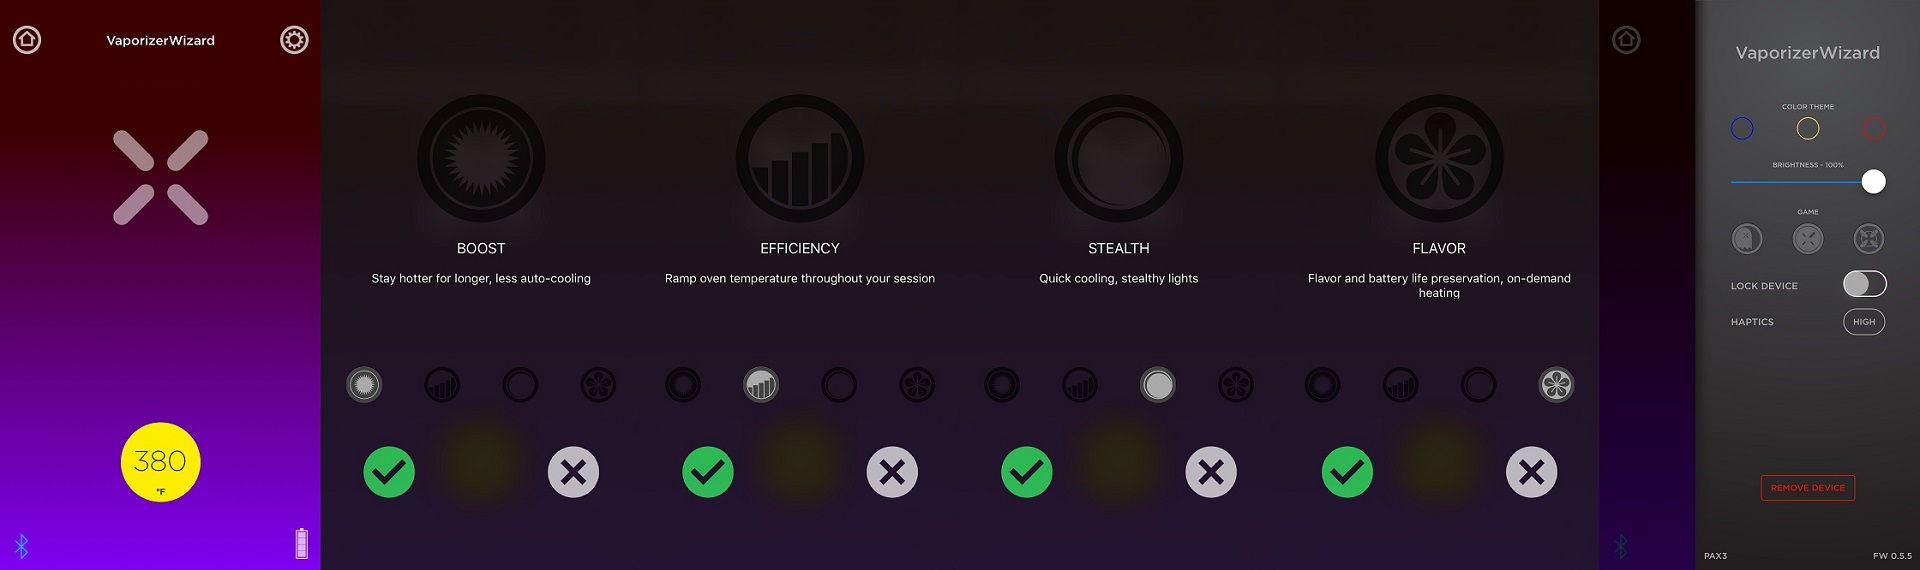
*It’s important to note that you don’t need a phone or the app to effectively operate the Pax 3. You can change temps via the power button located at the top just like you would with a Pax or Pax 2. The application only adds additional function and customization.
Chamber Info and Bowl Size
The chamber and bowl size has stayed the same on the Pax 3. The only differences are the three lids that come with the unit instead of just the full-pack oven lid. I have found that I can pack roughly .15-.20 grams of dry herb into the oven when I am using the half-pack lid depending on the grind (medium to coarse grind fits .15 and with an extra-fine grind it holds .20). With the standard oven lid, the Pax 3 oven will hold .30-.40 grams of dry herb. With the concentrate insert, I have found less is more, and performance drops and cleaning ramps up if you overload it.
Cleaning and Maintenance
So far I’ve noticed the draw resistance kicks up after around 8-10 bowls. The screen will start to clog around the edges and that’s generally when you’ll want to do a quick cleaning session. You will also want to wipe out the bowl and the underside of the mouthpiece as well. Occasionally you will have to do a full cleaning. You will need the supplied pipe cleaners and some isopropyl alcohol. Wipe out the vapor path, clean out the oven, and give the mouthpiece a good wipe down. A quick cleaning takes a minute or two, and the full cleaning will take about five minutes. Overall the Pax 3 cleaning is easy and straightforward but you do want to stay on top of it to keep your vape performing its best.
If you plan to use the concentrate insert you will have to clean the vapor path, and the underside of the lid a bit more frequently than if you were strictly using dry herbs. The concentrate insert does a very good job of keeping all the liquid contained so I have not had to do any extra cleaning inside the oven itself. I could see the included seal needing to be replaced at some point to ensure it doesn’t leak out and they have included an extra one for that purpose. The insert itself is really easy to clean, you just pop the stainless steel canister itself away from the plastic lid, and then drop it into some isopropyl alcohol.
Overall the Pax 2 and now the Pax 3 vaporizers have always been pretty quick and easy to clean. You just need to stay on top of them or the draw resistance will ramp up and performance will decline.
Pax 3 Battery Information
Battery Specs – Another big area of improvement in my Pax 3 vaporizer review is battery life. The Pax 3 now has roughly 17% more battery capacity with 3500 mAh vs the 3000 mAh in the Pax 2.
Battery life – In my testing with a full battery charge, I have gotten between 5 and 10 bowls depending on each session’s length and between 95 and 110 minutes of heated total run-time. This is generally getting me 140-180 total draws per charge.
Charging Info – In my tests, the Pax 3 has taken 95 and 105 minutes to fully charge from completely dead. So if you throw the Pax 3 onto the charger for 1.5 hours, you can expect 1.5 hours of runtime which is really impressive, especially for USB charging.
Honestly, the Pax 3 is probably the best unit for battery life at this point which is extremely impressive for its size, although it would be cool if the battery was user-replaceable.
The Pax 3 comes with a magnetic charging dock that charges via USB. It’s not the strongest magnet and you’ll need to rubber band the unit/charging dock together if you plan on charging on the go where it will be bounced around like a backpack. I wish they would have given us the smaller ‘mini-charger’ with the Pax 3 but it’s still available for purchase in the accessories section on their website. I’ve found it attaches much better to the unit and you don’t have to worry about it coming off if you are charging the unit on the go.
Pax 3 vs Pax 2
The Pax 3 comes in at the high end of the price spectrum and can be considered a “premium” vaporizer especially when you factor in the 10-year warranty. The closest vaporizer to the Pax 3 right now would be the Davinci IQ3.
If you already have a Pax 2, the main differences between the 2 and the 3 will be the heat up time, battery life, haptic feedback and the Pax Vapor APP. If you don’t care about improved battery, heating, and don’t plan to use concentrates you might be better off just picking up the half-pack lid for your Pax 2 as it’s easily worth the $13 price for me.
Now if you don’t have the Pax 2, even though the Pax 2 is now cheaper at $149 I still definitely recommend going straight for the Pax 3 “Complete Kit” because you get the half-pack lid and the concentrate insert. You are really not spending much extra to get the upgraded internals and accessories which are definitely worth that price in my opinion. Especially if you’ll be using concentrates. If you’re not a big concentrate user I would recommend getting the “Device Only” option and picking up the half-pack lid. The half-pack lid makes a huge difference if you’ll be vaping single user sessions.
Pax 3 Vaporizer Review Wrap-Up
Should you buy the Pax 3? – Overall I’m really impressed with the upgrades on the Pax 3. It’s definitely not a “new” vaporizer as far as design and aesthetics but internally Pax Labs made some great improvements. The faster heat-up time has me reaching the Pax 3 more than any other vaporizer in my collection currently and you can’t beat the portability/concealment factor. The Pax is my go-to whenever I go hiking/biking and especially skiing due to the fast heat-up times even in the freezing cold.
If you are looking for a vaporizer that is easy to use, reliable with a great warranty, consistent, enjoyable to use, and really stealthy the Pax 3 could very well be a perfect fit for you. I can already tell my Pax 3 is going to get more use than any of my other portables this winter on the ski slopes!
If you have any questions about the Pax 3, Pax 2 or any other vaporizer, feel free to leave a comment below or hit me up on my contact page and I will get back to you as soon as possible. Thanks for checking out my Pax 3 vaporizer review and have a great day!
Technical Specs
| Name: | Pax 3 Vaporizer |
| Category: | Most Portable Vaporizer |
| Manufacturer: | Pax Labs |
| Price: | $200 |
| Materials: | Dry Herbs and Concentrates |
| Temp Range: | 360F – 420F |
| Heating: | Conduction |
| Battery Life: | 5-6 Bowls Avg |
| Battery Type: | Non-Replaceable / Rechargeable / 3500mAh |
| Charging Type: | Charging Cradle / 90 Minutes |
| Warranty: | 10 Years |
| Extras: | Smartphone App |
Pax 3 Vaporizer
The Pax 3 is a portable dry herb vaporizer made by Pax Labs. It's a rugged, pocket-friendly, session-style vaporizer perfect for use on the go.
Product Brand: Pax Labs
9.2
