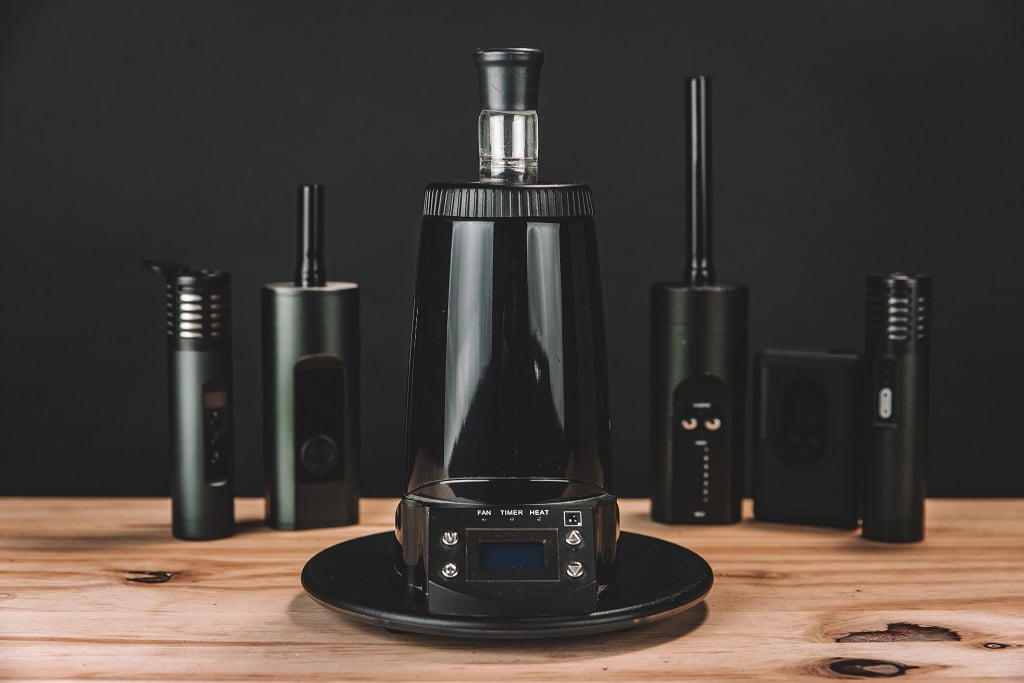
The Arizer Extreme Q is a dry herb desktop vaporizer featuring multiple delivery methods, full convection heating, and one of the best desktop vaporizers for the price. The Extreme Q is made by the Canadian company Arizer which is the same company that makes the Air Max, Air SE, Solo 2 Max, Solo 3 v2.0, the ArGo, and the latest desktop model, the Arizer XQ2, which is a newly upgraded version of the Extreme Q.
Arizer is known for releasing high-quality, reliable products at very competitive price points, and the Extreme-Q vaporizer is just that. A budget-friendly option for a solid desktop vaporizer. The Extreme Q has been a favorite among the vaporizer community for years.
The Extreme-Q vaporizer was released back in 2010. Although it’s now over a decade old, it continues to be one of the most popular desktop models, especially as an alternative to the more expensive vaporizers like the new Volcano Hybrid, and Ditanium.
This Extreme Q Vaporizer Review will walk you through the basic features, talk about the different options available, and compare it to some other popular desktop vaporizers. The Extreme Q retails for $199, and you can pick it up directly from Arizer below. Use coupon code VAPEWIZ20 to save 20%.
Table of Contents
Extreme Q Features
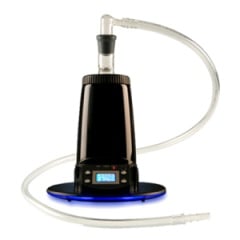
Multi-Purpose Tabletop Vaporizer – The Extreme Q is what is called a “multi-purpose” vaporizer. It has the option to fill bags through a forced-air system, or you can use a whip. The whip can be used in a couple of different fashions.
You can use it by “direct draw,” which won’t be assisted at all (No fan). You will use your lungs to draw heat over the chamber and get vapor through the whip. You can also use the whip with forced air. Basically, the same way you would fill the balloon, but instead, you are using the whip.
Effortless Interaction – The Extreme Q comes standard with a digital temperature display and remote control. You can adjust the temperature easily by pressing buttons on the display or using the remote.
This vaporizer is really the best of both worlds. I know many people who prefer whip-style vapes over balloons, and you get both options with the Extreme-Q vaporizer.
You can adjust the temperature down to a single degree if you want to get that precise, but I have noticed that you should run a little higher than normal because the chamber sits higher than the heating element. So to get the best vape temp, you should set it around 372 degrees.
Extreme Q Options: Whip vs. Balloon
Whip Option – The whip’s vapor quality is decent, and I found it best to use the assisted forced air on the lowest fan speed setting to get the best results. You can also use it with no fan at all, but you need quite a bit of lung power for this one.
Balloon Option – The other thing I noticed was the amount of time it takes to fill the balloons. The slowest fan setting gives you the best vapor quality. It takes about 3 ½ – 4 minutes to fill. You can bump it up to fan speed three, which will knock down the fill time to about 1 ½ minute. But when I did this, I noticed the vapor quality became less dense and not as satisfying. At least I felt it was nowhere near the vapor density of a Volcano balloon.
On the plus side, it was a bit quieter than the volcano when filling the balloons and, again, a fraction of the Volcano Vaporizer price.
Warranty Information and Coverage
Warranty Info: The Extreme Q comes with a lifetime warranty on the ceramic heating element and a three-year warranty covering defects in materials and workmanship.
Straight from Arizer.com: “All units carry a lifetime warranty on the ceramic heating element. The Extreme Q and V-Tower have a limited 3-year warranty covering parts and labor costs against defects in materials and workmanship…Shipping costs and glass parts are not covered under warranty.”
Cleaning and Maintenance
This unit is fairly easy to clean, but it comes with multiple whips and screens, so it is time-consuming. I’ve also noticed the glass chamber that sits above the heating element tends to get pretty hot with prolonged use, and the bags tend to take quite a bit longer to fill when compared to the Volcano, BUT you’re also paying a fraction of the price.
Extreme Q Review Conclusion
Should you Buy the Extreme-Q Vaporizer? – Overall, the Extreme Q comes standard with some pretty great features like the digital temperature display and the included remote control. It also provides the user with multiple options being a multi-purpose vaporizer. As I mentioned earlier, some people do prefer the whip over balloons. You get to choose between the forced air balloon and the whip option.
The Extreme-Q is one of the best desktop dry herb vaporizers on the market, especially for the price. It is also fairly inconspicuous so that you could leave it in the kitchen, and not too many people would know what it is. The blue, glowing LED on the bottom and the remote control are nice features… they aren’t really needed. You can click here to pick up the Extreme Q directly from Arizer. Use coupon code VAPEWIZ20 to save 20%.
Personally, I prefer the vapor quality from the volcano balloons, but if you can’t quite shell out the cash for the volcano vaporizer, then the Extreme Q is by no means a bad vaporizer. If you think that something more portable would be better for your needs, check out my best portable dry herb vaporizers article.
Buying Options and Coupon Codes
Technical Specs
| Name: | Arizer Extreme Q |
| Manufacturer: | Arizer Tech |
| Price: | $199 |
| Materials: | Dry Herbs |
| Heating: | Convection |
| Warranty: | 3 Years |
Arizer Extreme Q Vaporizer
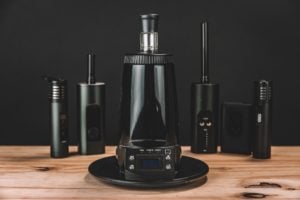
The Extreme-Q is a dry herb desktop vaporizer made by the Canadian company Arizer. The Arizer Extreme-Q vaporizer is a multi-purpose desktop meaning that it uses both a whip option and a bag option. The Extreme Q features a full temp spectrum, easy to read digital display, and a fan-assist option.
Product Brand: Arizer
8.7
